 US Dollar
Whether she will be a flower girl in a wedding, attending a holiday gathering, or dressing up for her first communion; appearance is everything for your Princess on that special day. From the dress she wears to the jewelry picked out to match her entire outfit. We know how complicated preparing every detail to perfection can be. Any help with at least one of those details goes a long way. Because of this Pink Princess found a useful way to help our busy moms with an irritating problem often faced when simply dressing your Princess; tying the perfect sash bow!
It seems simple but after few attempts without an experienced helping hand we all know this can become a timely set back. We have created a step by step guide along with images to help you create that perfect sash bow:
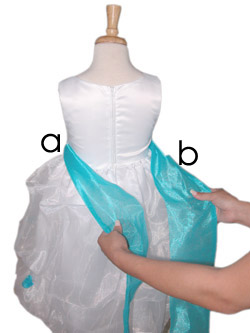
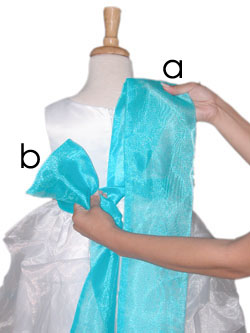
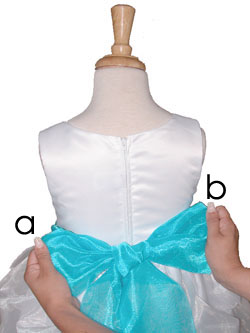
1. First you will want to line up both sides “A” & “B” of your sash to be straight, smooth and even.
2. Bring “A” to the right directly over “B”.
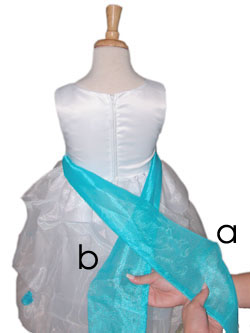
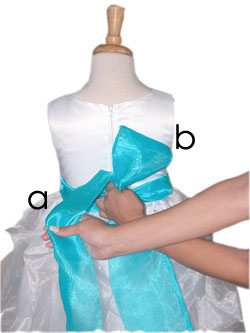
3. Take “A” directly under-behind-up-over of “B” making the first tightening tie
4. Next take the excess part of “B” and bring it up creating the first loop
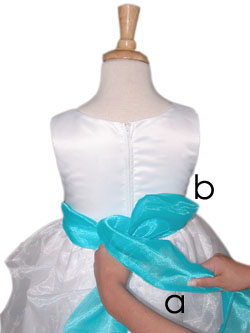
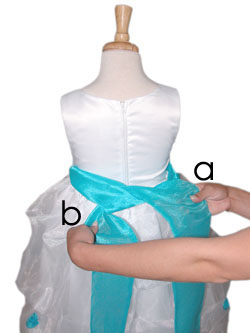
5. While holding that first loop in place, bring “A” directly up-behind-around-and through the “B” opening whole creating the second loop (as you would on shoe laces).
**Carefully make sure both of the sash sides remain straight and in place as you pull it through the opening whole.
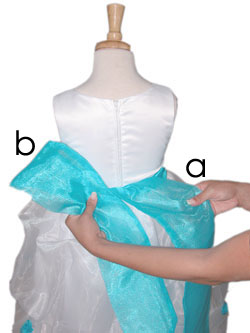
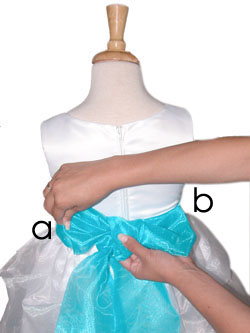
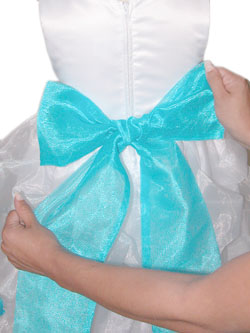
6. Straighten out the excess sash hanging from the bow and expand the material of the loops of your bow to give it the “round” look
Notes:
To adjust the tightening or symmetry of the bow, slightly pull the excess hanging sash to loosen the bow, then pull bow loops accordingly to tighten again as you adjust.
If you are using a two sided sash (usually satin or taffeta materials) twist “A” over to show the inside of the sash (stitched fold edge - back side) before following step 5.
This should keep the bow and the excess hanging sash showing the outside (smooth no fold edge) of the sash; while the center holding part of the bow alone exposes the inside (stitched fold edge - back side) part of your sash.
.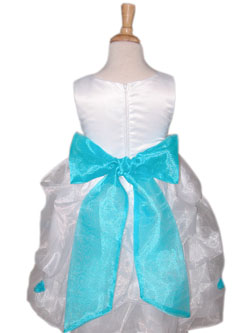
Your bow should now look even, smooth and pretty!
Click here for more Flower Girl Tips